
How to Create Animated Video with Nano Banana?
Turn Images into Cartoon Videos

I’m going to show you how to make an animated video with Nano Banana, using Google’s Gemini and Flow tools.
I’ll take you through each step — starting with creating a cartoon-style image and turning it into a full animated clip with sound.
It doesn’t matter if you draw the image right in Nano Banana or bring in one from somewhere else.
By the time we’re done, you’ll know how to make your own animated video with Nano Banana and tweak it for social media or whatever project you have in mind.
Table of Contents
Step 1: Prepare Your Workspace 🖥️
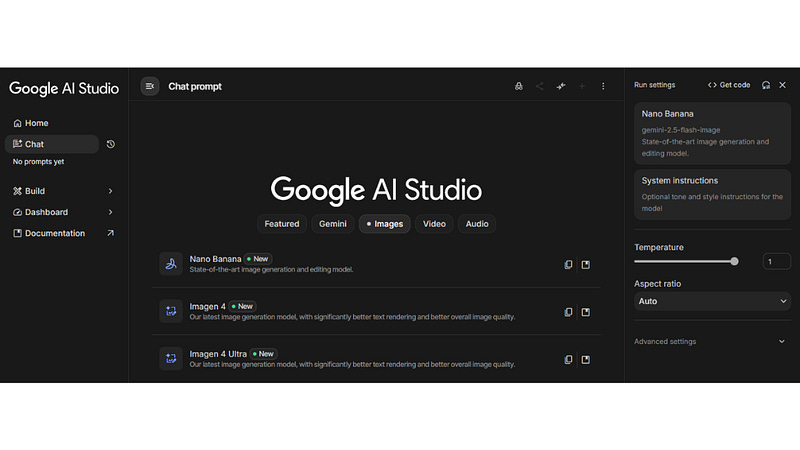
Start by signing in to Gemini (Google AI) or Google Studio. You’ll find Nano Banana inside Gemini, or you can open it through Google Studio — either way, you can make images and turn them into animations right away.
If you’re logged in, the image generator and video options show up together in one place.
Now decide: do you want to make a brand new image in Nano Banana, or just use a photo you already have on your computer or phone?
Both options work for creating an animated video. Once you’ve got your base image, the rest of the process is pretty much the same.
Step 2: Generate an Image in Nano Banana 🎨
Now it’s time to create the image that will become the heart of your Animated Video with Nano Banana.
In the Gemini interface, open a new conversation and select the Nano Banana image generator.
Type a clear prompt describing what you want. For example:
“Two children on a bicycle going down a valley surrounded by flowers, Pixar/Disney 3D cartoon style.”
Be as detailed as you want — art style, camera angle, mood, color palette, props, and character expressions all help.
You’ll get a preview first; if you want a different aesthetic, adjust the prompt and regenerate.
I recommend trying one 3D style and one 2D style so you can compare which yields a better Animated Video with Nano Banana.
Step 3: Save and Download the Generated Image 💾
When you like the artwork you’ve made, go ahead and download it to your computer. You’ll need that file for the animation part.
Always try to pick simple filenames like “banana.png” — makes things way easier to track down later.
If you’re working with several scenes, download each image on its own.
These are the files you’ll drop into the video generator to create your animated video with Nano Banana.
Step 4: Animate the Image with Gemini’s Video Option 🎬
With your image downloaded, open a new tab in Gemini and choose the video option (often labeled something like “Create with Veo 3”).
Upload the image file you saved. If you don’t type any instruction, the system will automatically generate a short animation from the image.
But you can also add a custom prompt to control the motion and mood.
Example prompts for animation:
“Make the children smile and pedal quickly down the slope, camera pans left to right, joyful soundtrack.”
“Create a slow, romantic bike ride with wind in their hair, soft depth-of-field, warm color grading.”
The generator will take a few minutes to render. When it’s done, preview the animation.
Step 5: Animate an External Image (Your Photos) 📸
You don’t need to create the image inside Nano Banana to make an Animated Video with Nano Banana.
If you already have photos on your computer or images from other AIs like Midjourney, Leonardo, or Recraft, you can upload those directly to Gemini’s video generator.
To animate an external image:
Open a new Gemini conversation and select “Create veo 3 video.”
Click “Add photo” and upload your file (for example, a cute kitten photo).
Type a simple animation prompt such as: “The cat jumps happily, 2D cartoon style.”
Submit and wait for the animation to render.
The results are surprisingly good. Animating an external image is a fast way to create personal Animated Video with Nano Banana content for social posts and short clips.
Step 6: Use Flow Labs for More Generations and Frame Control 🧩
If you want more control or additional generations beyond what Gemini allows, open Flow Labs (labs.google/flow).
Click “Create with Flow” and start a new project. Flow allows you to use frames for video and can accept the same images you created in Nano Banana.
Upload your Nano Banana image, then add a prompt specifying the action, framing, or style. If you’re on a pro account, you’ll see more generation options.
With a free account, note that the number of generations is limited (typically around five), but you can still produce multiple Animated Video with Nano Banana outputs.
Flow is especially useful when you want to compose multi-shot sequences or correct orientation issues (e.g., vertical vs. horizontal).
If you see a framing bug, revise the prompt to explicitly request the desired aspect ratio or camera framing.
Step 7: Download, Edit, and Assemble Your Cartoon Video ✂️
After the animation renders, download the video file. You can bring it into any editor — CapCut, Adobe Premiere, or your favorite mobile editor — to assemble scenes, add music, overlay dialogue, and fine-tune timing.
Tips for editing:
Trim awkward frames and stabilize the motion if necessary.
Layer multiple takes to create longer narratives or cutaways.
Color grade to match style across scenes (e.g., consistent warm or cool tones).
Use sound design to enhance motion (pedal sounds, wind, ambient crowd noise).
By combining several Animated Video with Nano Banana exports, you can build a longer cartoon sequence and prepare it for social videos or monetizable content.
Step 8: Practical Tips, Costs, and Account Notes 💡
Here are some practical pointers I learned:
If you want more than the default three generations inside Gemini, check Flow Labs. Pro accounts usually get more generations and faster iterations.
Free accounts often have limited generations (around five in Flow) but remain very usable for learning and small projects.
When a video renders with an orientation or framing issue, fix it by specifying “vertical” or “horizontal” in your prompt, or re-run the generation with corrected framing instructions.
Always save your generated images — you’ll reuse them for variations or as backups for future animations.
With these steps, you can consistently produce high-quality Animated Video with Nano Banana assets and scale your output for multiple platforms.
Step 9: Creative Prompt Examples to Try 🎯
Here are prompts that worked well for me. Use them as starting points and adapt for your own ideas:
“Disney-Pixar 3D cartoon: children on a bicycle, valley of flowers, joyful expressions, cinematic camera pan.”
“2D anime style: a cute monkey in a city rooftop, jumps happily, playful loop, soft pastel palette.”
“Portrait to motion: close-up of a character smiling and turning head, subtle hair movement, soft lighting.”
“Timelapse effect: sky transitions from day to night while characters ride through the valley, magical glow.”
Remember: specificity helps. Tell the system what elements you want animated (eyes, mouth, hair, background movement), and it will do a much better job producing a convincing Animated Video with Nano Banana.
FAQ — Frequently Asked Questions ❓
How long does it take to generate an Animated Video with Nano Banana?
Rendering times vary. Expect a few minutes for a single short clip. More complex prompts or higher-quality outputs may take longer.
Can I animate multiple images to create a full cartoon episode?
Yes. Generate or upload each scene, animate them individually, then stitch them together in an editor. Flow Labs and Gemini combined give you the outputs you need to assemble sequences.
Do I need a paid account to get good results?
No. Free accounts can produce excellent Animated Video with Nano Banana outputs, but paid/pro accounts provide more generations, faster processing, and often higher priority in queuing.
Can I use images made in other AIs?
Absolutely. Upload images from Midjourney, Leonardo, Recraft, or your phone. Gemini’s video tools will animate external images just as well, making it easy to reuse your existing assets.
How do I fix orientation or framing problems?
Add explicit instructions in your prompt (e.g., “vertical 9:16” or “horizontal 16:9”) or re-run the generation in Flow specifying frames for the desired aspect ratio.
Is the generated audio usable in professional projects?
The generated audio is a nice convenience but often needs replacement or augmentation for professional-grade work. Replace or enhance it with custom voiceovers, music, and sound effects in your editor.
Conclusion ✅
Making an animated video with Nano Banana is way easier than you’d think, and honestly, it’s pretty fun.
You can create images right inside Nano Banana or just bring in your own photos.
With tools like Gemini and Flow, those still pictures turn into lively cartoons, complete with audio and smooth movement.
Add some clever prompts, try a few different generations, tweak things a bit, and suddenly your video looks like something a pro put together.
Here’s a simple way to get started: make or upload your image, animate it using Gemini or Flow, then download and edit as you like.
That’s it. You’ll have your own animated video before you know it. Want to push things further?
Play around with 3D and 2D styles, experiment with camera angles, or stack a few different clips together to tell a bigger story.
So go ahead — dive in, mess around, and show off what you make with Nano Banana.